It's been a while! I have been so busy filming my final animation for my degree. I thought I would share with you the process I went through to make my little friend, Fred :D
Here he is all padded out, ready for his outer skin. For this I used....a car sponge! XD I simply cut it up so I could get the shape I wanted. (Mammoth car sponge from Wilkinsons)
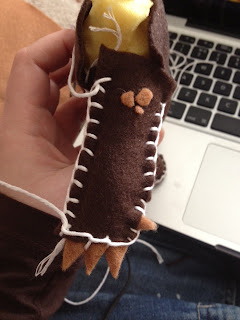
Right we at the best bit now. To make Fred's skin, I used brown felt and 100% white cotton Thread. The stitch here is a blanket stitch. (Blanket Stitch tutorial) I used a video on youtube (see link<<) to help me do this as I had never used this before. It's actually really easy :D
So thats most of him done, now his claws had to be made. For this I cut 2 small triangles of light brown felt and superglued both pieces onto each metal finger. I then proceeded to stitch around the claws to keep the arm attached. I also as you may see, added some 'scales' onto his arm to add detail to the character.
Ta Dah! Finished...........HAHAHA I'm kidding of course! He has no head or shell! This just won't do!
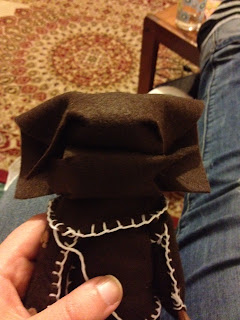
Here is his head, obviously need a little glue and thread.... Inside his head is so simple. It is the capsule from a kinder egg. I slotted this onto the metal neck and added foam to pad out. Also inside are two metal tongs/hooks??
Like this ^ Apologies for the picture, I didn't have my tablet available :/ Anywho, these hooks allowed me to open and close the mouth.
Oh LOOK^ he has a head! :D This is him almost finished. For the eyes, I cut out circles in white paper and glued on then cut out 2 smaller black circles for the pupils. these are attached with blue tack for ease. Also it means i can move his pupils.
Oh and the shell which popped out of nowhere?
This is the Carapace (the top shell), this is foam, for the shape, and the light brown felt on top, with the blanket stitch to finish off.
For the Plastron (bottom shell) I used a lighter felt, I cut two pieces of the same shape and stitched them together.
Here he is! in action!
If you couldn't tell by now, he is a Tortoise. He is modelled on my dad's pet tortoise of the same name :D
BONUS PIC!
This is me and my beloved Fred ^_^
I hope you enjoyed my wonderful making of post.
I will post again soon on how I made the props and sets for my animation.
Until then my beautiful bloggers, Toodles xx


No comments:
Post a Comment